Macro photography has long fascinated me. There’s a magic seeing things up close, and discovering patterns, textures, and colors that are not apparent to the casual observer. Unfortunately, much of the equipment one needs to do macro photography is prohibitively priced. I’m not talking only about the kind of equipment one needs to see microscopic things. Even an ordinary 105mm Nikon macro lens that will get you lifesize images will run close to $900). Since I don’t have that kind of cash sitting around, I’ve had to come up with alternatives, which I describe below. First, here’s our control shot of our macro subject for the day, a coin from the defunct Soviet Union that measures about 11/16 inch across. This shot taken using the ordinary Nikon 55-200mm lens stretched to 200mm. (Note: I’m using a Nikon D40 for these shots, along with Nikon-compatible lenses and add-ons; you’ll find similar equipment for Canon.) Oh, and note that the coin images are all uncropped, so you can see a true comparison of the magnification using different setups.

And for reference, here’s the closest one can get using the Nikon kit 18-55mm lens:

Ready for our first close up? Great. We’ll start by using this same lens with a small addition called a diopter. Essentially, it’s a magnifying glass that attaches to the filter screws on your lens, giving you greater magnification. You can find these on eBay for $7 or so — the one I got came with an additional piece that serves as a cheap wide-angle lens. Here’s the macro diopter alone:

Here’s the setup with the lens:

And here’s the result:

Gettin’ closer! But I’ve got two more configurations that will get us even more detail. We’ll need another cheap addition for the next one: a macro coupler ring. This screws onto the filter threads of one lens, and allows you to attach another lens. For the second lens, I’m using an old Nikon 50mm lens that I got on eBay for about $30. (This won’t autofocus, particularly the ways I’m using it, but that’s fine for macro shots, where the camera is often so close to the subject that the autofocus gets confused.) If you’re interested in learning more about lens reversal and how it works, read this. But I’m going to jump right into the results. Here’s the macro coupler ring:

And here’s what it looks like holding my 50mm lens on the end of my 70-200mm lens: Put them together and you get this setup (the larger lens on the right attaches to the camera body):

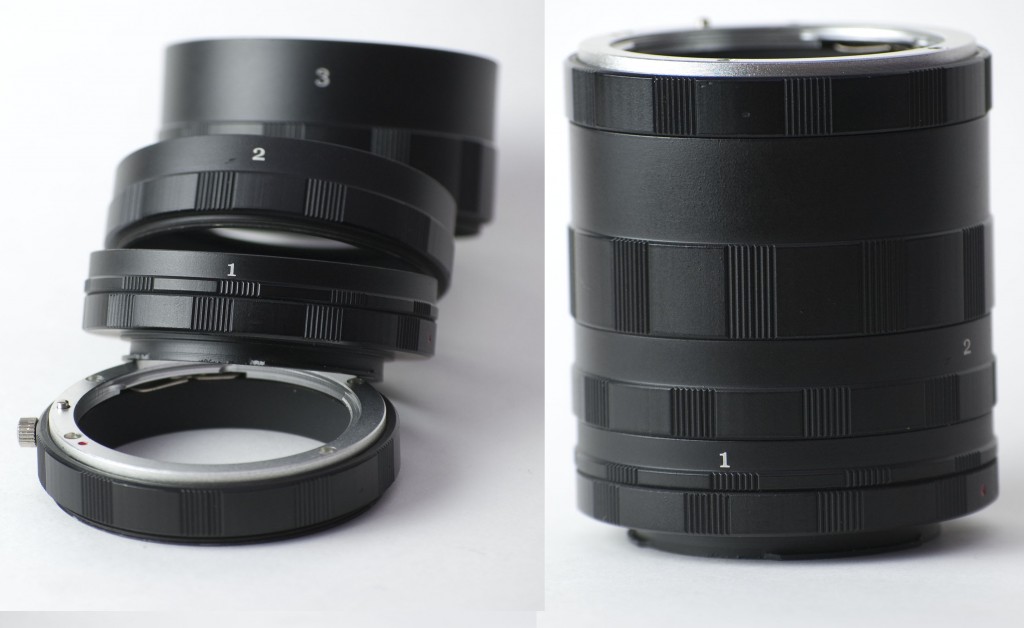
And it yields this macro:  Our final setup pairs the 50mm lens with another inexpensive accessory called an extension tube. While you can get an extension tube with electronics in it for around $80, if you have an old manual lens and don’t mind shooting on manual, you can get simple tubes on eBay for under $10. And since the tubes contain no lenses/glass, cheap is just as good as expensive as far as picture quality. Here’s what my set of tubes looks like:

Here’s what they look like attached to the lens:

And that brings us to our closest image of the coin:

Not bad, eh? And note that while the $900 Nikon macro lens mentioned above gives you a 1:1 ratio (same as life size), my modest lens-reversal technique gets me to 4:1 — four times life size! At this level, the depth of field is extremely small; you can see that a very slight tilt to the coin renders some areas sharp while others are going out of focus. Aligning your subject and focusing on the key part will be increasingly important as you crank up your macro power. I’ve used these setups for soap bubbles, insects, flowers, water droplets, and more. There are other macro methods possible, including the use of bellows (similar to extension tubes) and lens reversal rings for a single lens. Find the one that works for you, and happy macro-ing!
Hello Edz:
One issue you may have is that to join two lenses, you’ll want the outer (reversed) lens to be a manual lens, so you can control the aperture using the ring on the lens. I don’t know the details of your lenses, but if they’re AF-S or equivalent, that may not work.
As noted above, if you did connect those two lenses, you’d want the larger lens (the Tamron) connected to the camera, and the other one reversed. And because of the filter size difference, you may need to attach a step-down ring to the macro coupler to make them fit together.
Yes, you can certainly use a macro coupler without extension tubes; in fact, I have not used both a macro coupler and extension tubes in the same setup. But with extension tubes, again you’ll want to have a manual lens so you can set the aperture with the ring. The exception would be if you have the much more expensive extension tubes with electronics built into them, allowing you to use the lens’s metering and autofocus functions as if it were attached directly to the camera.
Without knowing more about your camera and lenses, that’s the best answer I can give. I hope it’s helpful. Happy macro-ing!
Scott
hello sir Scott Allan Stevens,
i want to use macro coupler(reverse ring). i have tamron 70-300mm(62mm filter size) and nikkor 18-55mm..is it compatible? or is it possible if i only use macro coupler even without the use of macro extension tubes?
thanks.
🙂